Lesson 4a: Displaying images
By now you're probably wondering when I'm going to get to the good stuff, you know, like showing pictures and stuff. Well, let's get to it.
First, it is important to understand that images are resources. This means that once they are loaded they stay loaded only while they are needed. Once a resource is loaded, though, it is available immediately to any code that needs it. It's a very powerful idiom, and we will explore using images as resources in the second half of this lesson.
Images are defined by the <image> tag. You tell the player which file to load by providing it with a URL. URLs are merely the URI-format location of the file on disk or internet. UJML treats URLs as relative addresses to the location of the executing UJML program. The exception is when you specify a complete URI with either an http:// or file:/// or other URI header.
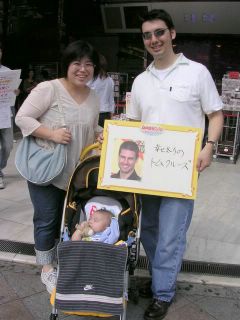
I'll use the graphic located at http://photos1.blogger.com/img/158/8299/320/050923_003L1.jpg as the sample image for this lesson.
If you just specify an image with the URL, the image will be displayed at 0,0 (or the top-left corner of the screen). Unfortunately, it will also be displayed with a width of 0,0 which means that it won't be visible at all. This is a common theme in UJML: the default values are typically 0, so it's important to set them correctly. DO NOT RELY ON UJML TO SET DEFAULTS.
I'm not so interested in displaying the image somewhere in the middle of the screen, so for the time being I'm not going to change the x,y offsets. However it is important that I change the width and height properties so that the image is properly displayed. The image is 240 pixels wide and 320 pixels high.
I specify the image as follows:
<image>
<url>http://photos1.blogger.com/img/158/8299/320/050923_003L1.jpg</url>
<width>240</width>
<height>320</height>
</image>
Logically it follows that since this is part of the display it should go into the display tag of our application. The simplified code follows:
<ujml>
<application>
<display>
<image>
<url>http://photos1.blogger.com/img/158/8299/320/050923_003L1.jpg</url>
<width>240</width>
<height>320</height>
</image>
</display>
</application>
</ujml>
Now, like the original Hello World program from Lesson 1, we have created a program that can display the data we wish to show the user.
One important aspect of this is that visual elements like images and labels can be stacked on one another. This is called Z-order. Items specified first will be displayed first, so each item drawn after that will be layered on top of it. You can think of this like a stack of visual elements where the last item drawn is on top of the stack while the first item drawn is all the way at the bottom and possibly even covered up by elements above it.
Let's say we wanted to write Hello World on top of the image we just drew. All that's necessary is to add a label to the display area.
<ujml>
<application>
<display>
<image>
<url>http://photos1.blogger.com/img/158/8299/320/050923_003L1.jpg</url>
<width>240</width>
<height>320</height>
</image>
<label>
<text>Hello World!</text>
</label>
</display>
</application>
</ujml>
Now, since the label is drawn after the image it is shown on top. If the order was reversed, the label would be invisible because the image would completely cover it up.
Next time I will discuss state variables and using them to display elements.
First, it is important to understand that images are resources. This means that once they are loaded they stay loaded only while they are needed. Once a resource is loaded, though, it is available immediately to any code that needs it. It's a very powerful idiom, and we will explore using images as resources in the second half of this lesson.
Images are defined by the <image> tag. You tell the player which file to load by providing it with a URL. URLs are merely the URI-format location of the file on disk or internet. UJML treats URLs as relative addresses to the location of the executing UJML program. The exception is when you specify a complete URI with either an http:// or file:/// or other URI header.
I'll use the graphic located at http://photos1.blogger.com/img/158/8299/320/050923_003L1.jpg as the sample image for this lesson.
If you just specify an image with the URL, the image will be displayed at 0,0 (or the top-left corner of the screen). Unfortunately, it will also be displayed with a width of 0,0 which means that it won't be visible at all. This is a common theme in UJML: the default values are typically 0, so it's important to set them correctly. DO NOT RELY ON UJML TO SET DEFAULTS.
I'm not so interested in displaying the image somewhere in the middle of the screen, so for the time being I'm not going to change the x,y offsets. However it is important that I change the width and height properties so that the image is properly displayed. The image is 240 pixels wide and 320 pixels high.
I specify the image as follows:
<image>
<url>http://photos1.blogger.com/img/158/8299/320/050923_003L1.jpg</url>
<width>240</width>
<height>320</height>
</image>
Logically it follows that since this is part of the display it should go into the display tag of our application. The simplified code follows:
<ujml>
<application>
<display>
<image>
<url>http://photos1.blogger.com/img/158/8299/320/050923_003L1.jpg</url>
<width>240</width>
<height>320</height>
</image>
</display>
</application>
</ujml>
Now, like the original Hello World program from Lesson 1, we have created a program that can display the data we wish to show the user.
One important aspect of this is that visual elements like images and labels can be stacked on one another. This is called Z-order. Items specified first will be displayed first, so each item drawn after that will be layered on top of it. You can think of this like a stack of visual elements where the last item drawn is on top of the stack while the first item drawn is all the way at the bottom and possibly even covered up by elements above it.
Let's say we wanted to write Hello World on top of the image we just drew. All that's necessary is to add a label to the display area.
<ujml>
<application>
<display>
<image>
<url>http://photos1.blogger.com/img/158/8299/320/050923_003L1.jpg</url>
<width>240</width>
<height>320</height>
</image>
<label>
<text>Hello World!</text>
</label>
</display>
</application>
</ujml>
Now, since the label is drawn after the image it is shown on top. If the order was reversed, the label would be invisible because the image would completely cover it up.
Next time I will discuss state variables and using them to display elements.
posted by Lauren Smith at 7:53 AM
![]()

1 Comments:
I updated the code to fix a syntax error. <image> tags must be surrounded by <display> tags.
Post a Comment
<< Home